Workouts
Thursday: My Dumbbell Circuit—in record time too. (I’ve had to workout in about 45 minutes everyday this week because we’ve been so busy. It’s not ideal, but I’m making it work.
Today: We’re going to a Cubs game today (and tomorrow…and Sunday), so I don’t even have time to workout, which is a weird feeling. Usually, I just don’t want to.
Raise your hand if your food pictures look disgusting!
Ya, mine do too.
Since the beginning of Gettin’ My Healthy On, I’ve been using a dinky little camera phone for all my food pictures, and it very rarely does the recipes any justice. It’s so sad. If you look back at my recipes, you’ll see some okay ones and some what-the-heck-is-that ones. Thanks to my man friend, Matt, I get to borrow his awesome phone that takes amazing pictures–then again, I think any phone takes better pictures than mine…
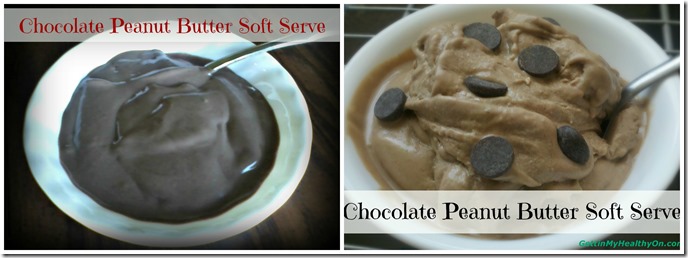
What motivated me to write this post was when I changed my past Chocolate Peanut Butter Soft Serve recipe picture to an improved version (taken with his phone rather than mine). Below are the before and after pictures…of the same. exact. recipe. I don’t really get it. I’m thinking I used more cocoa powder in the first one?
I pinned the recipe again on Pinterest recently and got an INSANE number of repins and page views from it. It still blows my mind how much a simple picture can draw so much traffic to a website—or how it can repulse anyone who lays their eyes on it…
My goal is for people to look at my food pictures and do the following:

That definitely has not been the case thus far.
I like to think that the following quote applies…
…but I’m starting to wonder. Some of my pictures are crazy bad.
This leads me to the bulk of this post. How can I make the most of having such a horrible camera? Well, now I just steal Matt’s phone all the time. Sometimes it’s not available, though, so I just have to make my sad little camera phone work. Here’s how I’m trying to improve it’s poor quality:
Lighting: Always use natural light
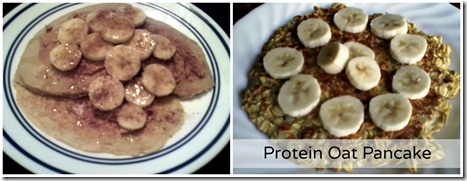
Avoid your camera’s flash and indoor lighting whenever possible. Otherwise, your pictures are going to look pretty funky, and the food won’t be so appetizing. I’ve found that indoor light doesn’t show the details like natural light can. Below you can see indoor lighting (left) and natural lighting (right) on two different pancake recipes.
Garnish: Use ingredients to add color
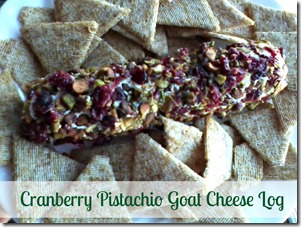
I’ve found that garnishing a dish helps it look fresh. Herbs and spices are awesome for simple garnishes, but some ingredients from the recipe can be great too. I find that garnishing really splits up the image so it’s more appealing. It also helps distract from what’s lacking in image quality with other elements… Just saying.
Perspective: Try different angles
Some foods might look best from above while others are more attractive from a side angle. I suppose it just takes some experimenting to find the best perspective. This also depends on what props you want to display in the background.
Props: Give your food some friends
This is something I’m really working on–getting creative with the place setting and the backdrop. I’ve found ingredients for the dish to make great props. Ideally, I’d use some fancy napkins and bowls and such, but I try to make due with the minimum. In the end, you’re creating a feeling or mood to associate with the food. For example, cookies = happiness. Make it happen!
Focus: Make the actual food the clear focus
Whether focus is a feature on your camera, or you go back to edit the image later (guilty), adjusting the focus can change the way people look at the picture. I like to blur out the background so randomness doesn’t take away from the point of the picture–the food.
Editing: Do it but keep it to a minimum
This is a must for me and my sad little camera phone, as it can really enhance the appearance of food. From fancy Photoshop to free PicMonkey, there are several programs out there that can help improve recipe pictures. I like to adjust the hues if my camera or the lighting makes the food look weird. In the end, just don’t change the food to the point where it can’t be recreated. Basically, you don’t want all your food to look like it came straight out of Hook, unless you’re going to get crazy with the food coloring.

[Source]
Questions for you:
Do you have any tips for others when taking food pictures?
What’s your go-to method of jazzing up a recipe image? Garnishing is my friend.




That before and after picture is INSANE.
Right?! Craziest thing ever. That’s the result of having a good food processor, using Matt’s phone, and having awesome lighting.