Gettin' My Healthy On

  • Home
  • About
  • Favorites
  • Fitness
    • Exercise Guide
    • My Workout Log
    • Workouts
  • Recipes
  • Explore
    • Blogging
    • Fitness
    • Healthy Eating
    • Healthy Living
    • Music Playlists
    • Quotes
    • Recipes
    • Reviews
    • Tips
    • Workouts
You are here: Home / Posts / Recipes / Dark Chocolate Peanut Butter Cups

Dark Chocolate Peanut Butter Cups

October 16, 2017 by Katie

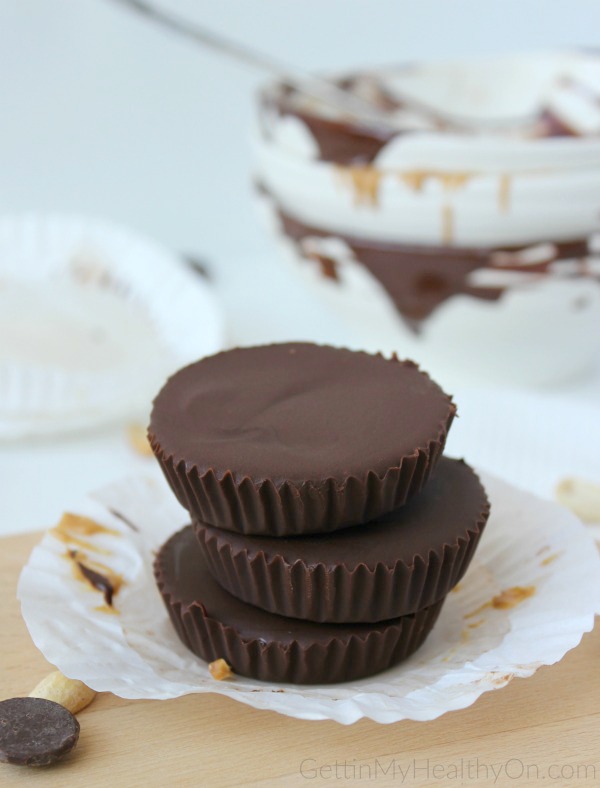
Make homemade peanut butter cups with this melt-in-your-mouth recipe using dark chocolate for a rich and decadent dessert!

Dark Chocolate Peanut Butter Cups

Dudes. This was one of those recipes that was completely effortless to take good photos of. I am puuumped to share this homemade peanut butter cup recipe because it has been absolutely spoiling my sweet tooth over the past few days.

Confession: I made these tasty discs a few weeks ago at about 8 p.m. on a Wednesday because I was craving chocolate like woa. I had never even made homemade peanut butter cups before then, but it just made sense when I was trying to think of a way to transform chocolate chips and peanut butter into a quick dessert.

Dark Chocolate PB Cups

Oh my lawd. I can’t get enough of these! …except I’m lying because eating more than one of these puts me over the edge because of that rich dark chocolate (and that, my friends, is what adulthood has done to my former candy-loving self).

A few things you should know about this recipe:

  • Only has three ingredients
  • Can be made in about 30-35 minutes (with minimal effort, might I add)
  • Is melty AF once you start to devour them

Homemade Peanut Butter Cups Ingredients

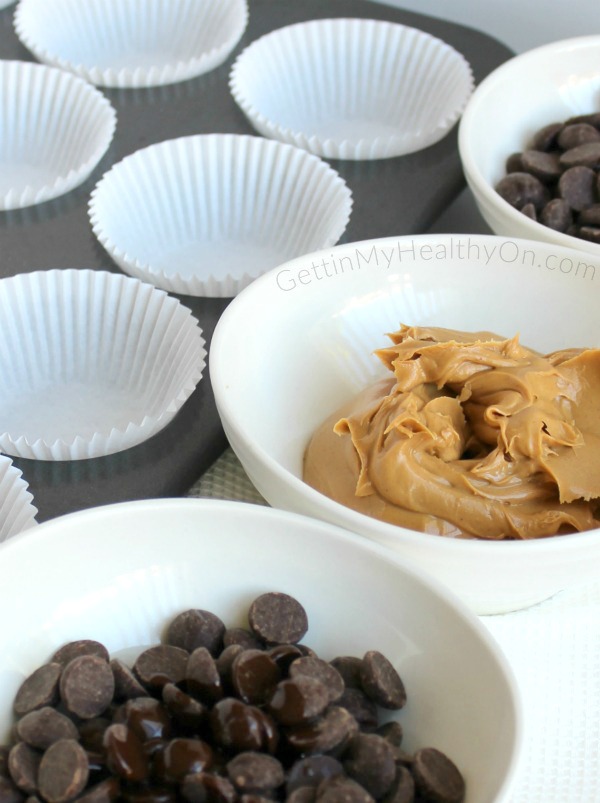
To make these, it’s a pretty simple step-by-step sandwich-making process. First, melt the chocolate chip and coconut oil mixture together. Divide that among the lined muffin tin cups. Freeze for a bit. Then warm the smooth peanut butter so it flows like a sticky waterfall. Divide that among the cups.

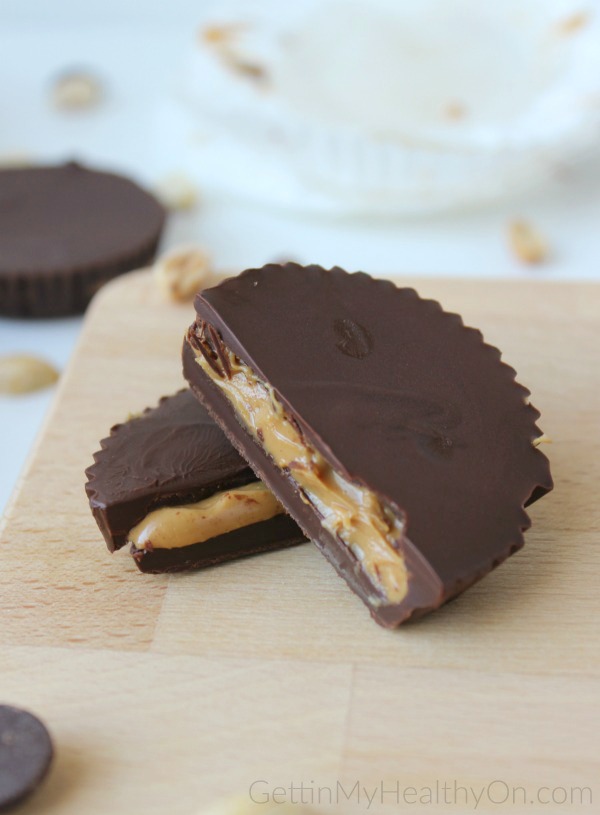
PRO TIP: don’t make the PB go all the way to the edges if you want the chocolate to completely cover the peanut butter guts. Or make it go to the edges if you want to see all three layers before biting into them. (If you do this, it’s even messier because the peanut butter squishes out the sides. Don’t say I didn’t warn you.)

Once the peanut butter is spread to your liking on top of the chocolate layer, melt the rest of the chocolate-coconut oil mixture and pour that over the top of the cups. Freeze for a little longer. Then they’re ready to eat!

Honestly, though, you can mess up the directions for this recipe, and it’ll still turn out delicious. The first time I made these, I didn’t even freeze them until after they were all put together. The layers were a little uneven since I kept adding melted layers on top of each other, so that’s why I’m providing so much direction below—in case you want the optimal structure. 😉

Print
Dark Chocolate Peanut Butter Cups

Prep Time: 35 minutes

Yield: 12 peanut butter cups

Serving Size: 1 peanut butter cup

Dark Chocolate Peanut Butter Cups

Ingredients:

  • 2 cups dark chocolate chips (10-12 oz bag)
  • 4 tsp coconut oil, divided
  • 2/3 cup smooth peanut butter

Instructions:

  1. Line a muffin tin with 12 cupcake liners. Set aside.
  2. Bottom Layer:
  3. In a small bowl, add 1 cup chocolate chips and 2 teaspoons coconut oil. Microwave for 1 to 1 1/2 minutes, until the mixture is melted and smooth when stirred.
  4. Divide the melted chocolate mixture among the lined muffin cups (about 1/2 tablespoon each). Using a spoon, make sure the chocolate completely covers the bottom of each cup. Freeze for 10 minutes.
  5. Middle Layer:
  6. In a separate small bowl, microwave the peanut butter for about 15 seconds, or until it becomes thin and easy to pour.
  7. Pour the peanut butter over the top of the chocolate-filled muffin cups, dividing it equally. Freeze for 5 minutes.
  8. Top Layer:
  9. Microwave the remaining chocolate chips and coconut oil until melted and smooth.
  10. Pour over the filled muffin cups, dividing the mixture equally and spreading to touch the edges. Freeze for another 15 minutes.
  11. Enjoy! Store cups in airtight container in the refrigerator.
3.1
Recipe from GettinMyHealthyOn.com

Like I said early on in this post, these are hella melty once you pick them up (especially if they’ve been at room temperature for very long). Due to this fact, I’d recommend always keeping these in the fridge (or even freezer), until you’re ready to eat one.

I hope you love these homemade peanut butter cups!! They are SO easy, and the way each layer hits your taste buds in their specific order (you know…like any peanut butter cup ever) is just perfection. Try it out and see what you think!

What’s your favorite candy? Reese’s peanut butter cups or Yorkshire peppermint patties (yes, really) are hands down my top two.

Are you making any festive treats for Halloween in a few weeks?!

Related Posts

  • Two-Ingredient PancakesTwo-Ingredient Pancakes
  • 8 Pumpkin Recipes to Make This Fall8 Pumpkin Recipes to Make This Fall
  • Maple Vanilla GranolaMaple Vanilla Granola
  • All About MushroomsAll About Mushrooms

Share this:

  • Tweet
  • Email
  • Print
  • More
  • Reddit
  • Share on Tumblr
  • WhatsApp

Filed Under: Dessert, Recipes

« Baked Garlic & Parmesan Potato Wedges
My Thoughts on Ashley Lane Fitness »

Comments

  1. Melissa says

    October 16, 2017 at 10:19 am

    Yup totes making these. Sometimes I just eat pb by the spoonful and throw some chocolate chips on top but this looks way better.

    • Katie says

      October 16, 2017 at 11:29 am

      I do the EXACT same thing!! It’s such an easy substitute for candy when you’re desperate haha. For some reason these PB cups taste way more exciting though. I have no idea why, but I’m not questioning it.

  2. Kathleen says

    October 17, 2017 at 4:42 pm

    Wow this seems really easy and you’re right, you can’t really go wrong! Looks delicious and I can’t wait to try them out!

    • Katie says

      October 18, 2017 at 2:03 pm

      Yes! Even messed up PB cups taste amazing haha. Hope you like them!!

About Me
Follow Me on Facebook Follow Me on Twitter Follow Me on Instagram Follow Me on Pinterest

Get New Posts by Email:

Trending

Sorry. No data so far.

logo

Health Advertising by

Instagram:

Today I shared what will be my last post over at G Today I shared what will be my last post over at GettinMyHealthyOn.com. Due to exciting things 🥰 about to demand more of my time, I knew I was ready to officially retire.
.
It's been almost 10 years 😳 since I started my blog, but I'm ready to move on to the next chapter of my life. If you can't tell by the photo, I'm so happy to share we're expecting a baby soon! 👶💜
.
While it feels weird to announce my pregnancy in a farewell blog post, that's ultimately what led to my decision to step down from the personal blog world.
.
A huge THANK YOU to everyone who has supported my blog over the last decade. ❤️ I'll still be posting here occasionally but wanted to share the news. 🤗 To check out the farewell post, visit the link in my bio.
Starting the weekend with a bit of sweetness. 😍 Starting the weekend with a bit of sweetness. 😍 First acai bowl in what feels like years. 🍓🫐 #TooPrettyNotToDocument #SendMoreGranola
Yessss, gimme dat chicken noodle, beef barley, pot Yessss, gimme dat chicken noodle, beef barley, potato, chicken tortilla, broccoli cheese, tomato, and all the other kinds I can't think of right now. 😅 #MmNoodleSoup
No idea how these are going to taste, but I'm pret No idea how these are going to taste, but I'm pretty thrilled with myself for finally taking the time to learn this canning thing.

 #SoManyPickles #SoManyCucumbers #TheresMoreInTheFridge 😅
If you're a cucumber fan (or have an overflowing c If you're a cucumber fan (or have an overflowing cucumber plant 🌱 like me), I recently discovered this 3-ingredient snack that's surprisingly good. Then again, I'll take any excuse to eat cream cheese. 😋 
.
All you need is cucumber slices, cream cheese, and Everything But the Bagel Seasoning. 😍
.
Recipe: ➡️ bit.ly/cream-cheese-cuc-bites/
All the rain we've been getting has been making my All the rain we've been getting has been making my garden (and therefore me) so happy. 😍 Cucumbers, green peppers, San Marzano tomatoes, and ghost peppers (😳) are all taking off. The green beans and strawberries aren't far behind. 🌱🍓 Pretty thrilled so far with my first in-ground garden. 🙌
.
Are you growing a veggie/fruit garden this year?
My favorite kind of Taco Tuesday: spicy shrimp tac My favorite kind of Taco Tuesday: spicy shrimp tacos! 🤤🌮 What's your perfect taco?
.
.
.
Recipe inspired by Oscar's Mexican Seafood in San Diego. ➡️ bit.ly/spicytaco
It's supposed to snow tomorrow, but today I'm goin It's supposed to snow tomorrow, but today I'm going to soak up the crisp air, warm sun, and a little bit of mud.
Follow on Instagram
logo
Health Advertising by

My Networks:

Fit Approach FitFluential Is Fitness Found Healthy Living Blogs
BlogLovin'

Recent Posts:

  • My Farewell to Blogging
  • Cream Cheese Cucumber Bites with Everything Seasoning
  • Goals for 2021: Living with Intention
  • December Favorites
  • Top 20 Posts of 2020
May 2025
S M T W T F S
 123
45678910
11121314151617
18192021222324
25262728293031
« Apr    

Archives

Follow Me on Facebook Follow Me on Twitter Follow Me on Instagram Follow Me on Pinterest Follow My RSS Feed
About Me | Workouts | Recipes | Disclaimer | Privacy Policy | Contact

Copyright © 2025 · Foodie Pro Theme by Shay Bocks · Built on the Genesis Framework · Powered by WordPress